
Automated Pit Design Tools
Studio OP provides a set of tools for the automated design of both pits and dumps.
This topic provides a summary of these tools. For an overview of
how pit and dump design tasks can be used
in Studio OP, see Auto Pit Design.
Task Prerequisities
To access the Pit Design task, the following must exist:
-
A pit must be defined.
-
A topography file must be defined.
-
If required, a constraining surface should be defined (this acts as a lower contact surface for the design).
-
A set of bench definitions must exist.
-
Slope regions must be defined.
Optionally, you may create or load constraint strings to constrain your pit projection.
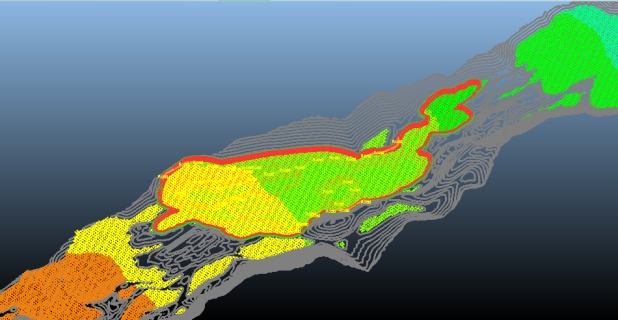
An example of an automated bench design showing model and contour lines
Task Areas
The Auto Pit Design task is split into the following sections:
-
Auto Pit Design – Define the design projection direction (bottom-up, top-down) and set up roads and constraints. You can also use this panel to calculate new design strings and surfaces (according to your geotechnical parameters) and decide if bench evaluation will be performed. You define all settings as a scenario, and you can define as many scenarios as you like.
See Pit Design Scenarios.
-
Conditioning – Configure how design strings for pits are blended between regions for each pit design scenario. It is also used to set up other rules for how strings are projected, such as the maximum slope or berm width change over a given distance and how filleting radii are applied.
-
Berm Tapering – Control how (or if) berm tapering is applied for a scenario, either throughout the pit or for individual bench constraints.
- Advanced – Define advanced settings for your automated designs, such as how gradients are calculated/applied, the evaluation legend to be used and what colours to use to display design strings and surfaces. These settings are applied to all defined scenarios. See Auto Design - Advanced Settings.
Related topics and activities: